Layering Up with CSS Cascade Layers
Last updated: March 10 2022
Where I live, the weather is finally starting to get warm enough for us to go out without needing to bundle up – but, as it turns out, we can’t be done with layers just yet! Recently, all three major browsers (Chrome, Safari*, and Firefox) included in their most recent updates a new CSS feature that has us thinking about layering up in a whole new way!
I am, of course, talking about Cascade Layers. The cascade and specificity aspects of CSS are inherent to its function, but they’re also very different to the ways that many other programming languages work – and that throws some folks (understandably) for a bit of a loop. With this new update, however, we have a new tool that allows us far more control over the cascade than we’ve ever had before. It’s going to change the way we organize our stylesheets individually, as well as (potentially) the architecture of our applications styles on a larger scale. Basically: it’s cool as hell, and it makes it a lot easier to write cleaner CSS that won’t be plagued by conflicting styles.
*Safari support for Cascade Layers is still in their “Technology Preview” development browser as of the writing of this article (March 4, 2022), but is expected to be standard in their next release.
Starting at the beginning: what’s the cascade?
To have a full understanding of Cascade Layers, we first have to have an understanding of the cascade, itself.
When we’re talking about the cascade in CSS, we’re talking about the flow of styles. Styles flow from most general to most specific. That means that if multiple styles could be applied to the same element, the style that will “win” is the one that is most specific. Let’s take a look at an example:
<body>
   <section class="main">
     <h1>Title</h1>
     <div>
        <p>Here's some intro copy.</p>
        <p>Here's some body copy.</p>
     <div>
  </section>
</body>
.main {
  color: blue;
}
Starting off, the h1 and the p text will both be blue, because the parent section has a class applied (.main) which sets the color to blue.

The color is inherited from the section parent to its h1 and divchildren, and then again from the div to its p children. You can think of it like water, flowing down stairs – it will always continue flowing, unless actively blocked by something else.
That “something else” that can block the style is specificity. When we apply a conflicting style to a specific element, it overrides the general style that would otherwise be applied. Let’s take another look at our example – if we add a new style that targets h1s specifically and sets a style that can’t be integrated with the one already applied, then that more specifically targeted style will “win” over the more general one.
.main {
  color: blue;
}

h1 {
  color: green;
}

Let’s take this experiment a step further and specify that we want to only target the h1s inside the .main class. So we saw that the .main styles would “losing” to the more specific h1styles, but now those h1 styles will “lose” when compared to this new style that specifically targets only a certain subset of h1s. The more specific style is the one that’s ultimately applied.
.main {
  color: blue;
}

h1 {
  color: green;
}

.main h1 {
  color: orange;
}

This is further complicated by the multiple sources for styles that ultimately end up compiled by your browser in order to determine the final appearance. This includes the (likely more than one) stylesheets you’ve written personally for your app, the third-party library stylesheets included by things like external component libraries or icon libraries, user preference stylesheets that handle the user’s personal styles (such as whether they have light/dark mode set, custom font sizes, etc.), and – finally – the default styles of the browser, itself. Whew!
Got it. So, what are Cascade Layers?
Cascade Layers are basically a way to group CSS declarations so that they all cascade together as one unit, instead of on a property-by-property basis the way they would otherwise. If you’re familiar with design software, like Photoshop or Figma, it’s basically the CSS equivalent of the group command there.
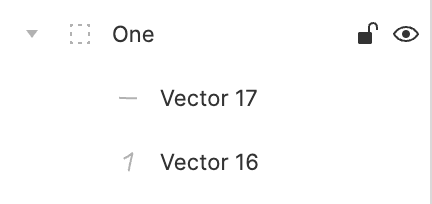
For example, in this screenshot from Figma, we have a Grouped Layer named “One” that contains two elements: “Vector 17” and “Vector 16” (because, yes, I am terrible at naming things, thank you for noticing). If I wanted to move “One” to be the very top layer, then “Vector 17” and “Vector 16” would move too.
Cascade Layers work in the same way, but instead of elements on a page that we’re moving up and down in the layer stack, we’re grouping CSS property rules and moving them up and down the order of the cascade. This allows us to override the way that the cascade would normally flow, because layer precedence overrules individual element precedence. Layers can also be ordered (and nested!), so you can create your own flow and hierarchy of the layers, themselves.
Sounds cool, but what’s the actual use case here?
The major goal of Cascade Layers is to prevent conflicts between multiple sources of styles – they offer the developer complete control over the order of styles coming in from wherever in your application, no matter when or where those styles were written.
Previously, we’ve attempted to solve (or at least mitigate) this problem with naming rules and processes like Object Oriented CSS, Block Element Modifier methodology, Inverted Triangle CSS, or other similar approaches. However, these weren’t always effective – most notably, you’re likely to struggle if you’re attempting to use one of those methods in combination with an external, third-party library that doesn’t use one (or worse, uses a different method from the one you’re using). Ultimately, this leads to some very long and specific names for elements, spaghetti CSS, and abuse of !importants in order to get everything to play nicely together. Not the ideal, to say the least.
Let’s see some code
“Yeah, yeah,” you say, “booooooring. I already knew all that stuff and I just wanna learn how to use this new feature.” Fair enough – let’s dive in!
Defining Cascade Layers
You can define @layers like so:
@layer [layer name] {
	[layer styles]
}
The syntax is kind of similar to writing media queries with @media. You’ll call @layer and give the layer a name, then open the brackets and write any styles you want grouped together as part of that layer.
Creating your layer stack
You can also define a “stack” of layers by creating a list:
@layer layer1, layer3, layer2;
This works because the specificity order of your layers is based on the order in which the layers appear in your stylesheet – for that reason, it’s best done at the very top of your stylesheet, right after the imports, but before any actual style definitions. In the same way that element styles are overwritten by conflicting styles further down the page, layer specificity is also based on the order of appearance. Using this list allows you to define (and quickly update / rearrange) your layers in any order you like, in order to have full control over the cascade.
Importing layers
You can also define imported style sheets as their own layer (or add them to a communal layer). This can be especially handy for managing those external style sheets we discussed earlier. For example, here I’m importing the custom stylesheet I use to theme my KendoReact components to look like the Star Trek LCARS UI. This is a chunk of styles that are important, but only apply to the UI of the components – I don’t want them to override my actual application layout styles. Now, I can stick them on their own kendo layer, and specify how I want that layer ordered in my global style sheet.
@import 'styles/LCARS.scss' layer(kendo);

@layer reset, kendo, app
Nesting layers
In a move sure to excite SASS fans, layers can be nested inside each other. Could this mean that nested styles are soon to follow in CSS? Fingers crossed!
@layer base {
	@layer theme {
		h1 {
			color: blue;
		}
	}
	@layer custom {
	 p {
		color: grey;
	}
}
Nested layers make use of dot notation, meaning that you can reference them by calling the parent and children, separated by a dot, like so: base.theme.
You can also reference those child layers in your list stack using the dot notation method:
@layers reset, kendo, base.custom, base.theme, app
Anything else I should know?
Ready to start layering up? Here are a few quick tips and tricks to keep in mind as you start writing your first Cascade Layers:
You can create unnamed layers (but you probably shouldn’t)
You can technically write @layers without names, but it’s not recommended. Not only does this make your code more difficult for other developers to understand, but it also has some significant downsides in terms of ordering your Cascade Layers. You won’t be able to re-order a layer easily without a name, since their order will be determined by where they are physically in your file – remember that layer order is determined by the first time each layer appears in your code, If you use a name, you can re-order quickly and easily using the list method at the top of your style sheet.
Layered styles override un-layered styles
It’s worth noting that Cascade Layers will not override non-layered CSS – this was done intentionally, for backwards compatibility purposes. This means that developers can start working in layers without having to worry about upsetting the flow of their existing styles. It’s actually a very clever approach, allowing folks to start using layers right away in their new code without having to update the entirety of their existing codebase first.
Layer specificity overrides element specificity
The thing about layers that makes them so cool is also something that goes against the way we’ve all been trained to write CSS up to this point – the specificity of the contents inside the layers is second to the specificity of the layers themselves. That means that if you have a less-specific selector in a higher-order layer, it will “win” over a more-specific selector in a lower-order layer. An example might help here:
<h1 class="title">Title</h1>
@layer base, pink;

@layer base {
  .title {
    color: green;
  }
}

@layer pink {
   h1 {
    color: pink;
  }
}
In this case, the less-specific selector (h1) is overriding the more specific one (the .title class) because we’ve ordered our layers in such a way that pink is applied over base.
But wait, I want to read MORE about this awesome thing!
-
Don’t worry friend, I got you. Here’s a list of articles I referenced to write this blog, as well as other cool explanations and breakdowns of the new feature:
-
Inheritance, Cascading, and Specificity in CSS Explained by Wilson Mock– not Cascade Layers specific, but a great overview of the tech behind them
-
Getting Started with CSS Cascade Layers by Stephanie Eckles for Smashing Magazine
-
Cascade Layers Explainer by Miriam Suzanne (with input from Jen Simmons, Elika Etemad, Florian Rivoal, and Tab Atkins Jr.) – this source is technically outdated, but does a good job of explaining the rationale and use cases for Cascade Layers
-
Cascade Layers by Chris Coyier – can you even talk about CSS without talking about CSS Tricks?
-
A great visual of the cascade With vs Without Cascade Layers by Jen Simmons on Twitter
Don’t get caught laying down on Layers
We’ve known Cascade Layers were coming for quite some time now – I’d say we’ve had about a year of them being in common discussion as a feature that we knew was coming soon – so it’s incredibly exciting for them to finally be here, supported and ready for us to use! They’re going to be a huge organizational and architectural help; personally, I’m thrilled to start working them into all my projects ASAP! What do you think: are you excited by the possibilities of Cascade Layers? Going to start using them right away, or still a little confused? Know exactly how you’re going to implement them, or still getting a feel for what’s best for your project? Let me know in the comments!
◀ Back to all blogs